
Erase the Evidence: Expert Guide to Remove Burn Marks from Non-Stick Pans
Are you staring at unsightly burn marks on your favorite non-stick pan, wondering if it’s destined for the trash? Don’t despair! This comprehensive guide is your one-stop resource for effectively and safely **remove burn marks from non stick pan**. We’ll delve into proven methods, expert tips, and preventative measures to restore your cookware and extend its lifespan. This isn’t just another superficial cleaning guide; we provide in-depth explanations, drawing upon practical experience and best practices to ensure you achieve optimal results without damaging your pan’s delicate surface. You’ll learn about the science behind burnt food residue, the best tools and techniques for different types of burns, and how to maintain your non-stick pans to prevent future mishaps. Prepare to transform your charred cookware back into pristine condition!
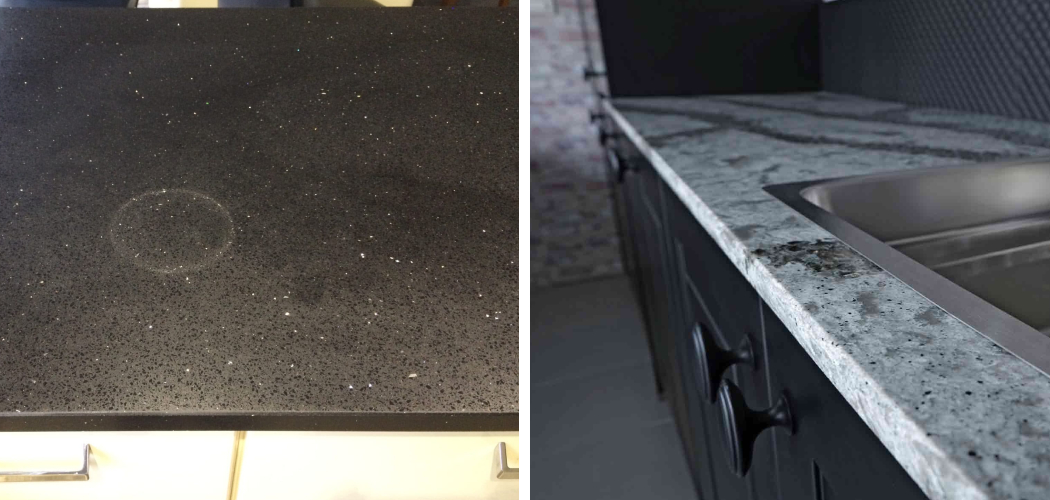
Understanding Burn Marks on Non-Stick Pans
Burn marks on non-stick pans are a common kitchen woe. But what exactly are they, and why are they so persistent? Understanding the nature of these marks is the first step in effectively removing them.
What Causes Burn Marks?
Burn marks typically result from overheating food, especially those high in sugars or proteins. When these substances are exposed to high temperatures for extended periods, they undergo a process called pyrolysis, essentially burning and carbonizing. This creates a tough, blackened residue that adheres strongly to the pan’s surface. The non-stick coating, while designed to prevent sticking, can still be vulnerable to this intense heat and the resulting residue.
Different Types of Burn Marks
Not all burn marks are created equal. They can vary in severity and composition, influencing the best removal approach:
* **Light Surface Burns:** These are often characterized by a thin, slightly discolored layer of residue. They’re usually the easiest to remove.
* **Stubborn, Baked-On Burns:** These result from prolonged exposure to high heat, creating a thick, hardened layer that’s difficult to dislodge.
* **Burnt Sugar Residue:** Sugar burns tend to be particularly sticky and challenging due to their caramelization properties.
* **Protein Burns:** Protein burns, like those from meat or eggs, can create a tough, almost plastic-like residue.
Why Non-Stick Coatings Matter
Non-stick pans are coated with materials like Teflon (PTFE) or ceramic, designed to minimize food adhesion. These coatings are generally heat-resistant, but they can be damaged by excessive heat, abrasive cleaners, or sharp utensils. Understanding the limitations of your pan’s coating is crucial to prevent damage during the cleaning process. Furthermore, ongoing research continues to improve non-stick coatings, making newer pans more resilient.
The Golden Rules for Removing Burn Marks From Non-Stick Pans
Before diving into specific methods, let’s establish some fundamental principles to ensure safety and effectiveness:
* **Always Let the Pan Cool:** Never attempt to clean a hot pan. Sudden temperature changes can warp the metal and damage the non-stick coating.
* **Avoid Abrasive Cleaners:** Harsh scouring pads, steel wool, and abrasive powders can scratch and ruin the non-stick surface. Opt for gentle, non-abrasive alternatives.
* **Use Non-Scratch Utensils:** When scrubbing, use soft sponges, microfiber cloths, or specialized non-scratch scrubbers designed for non-stick cookware.
* **Gentle Pressure is Key:** Avoid excessive force, which can damage the coating. Let the cleaning solution do the work, and gently scrub to loosen the residue.
* **Rinse Thoroughly:** Ensure all cleaning solution is completely removed from the pan to prevent residue buildup and potential health concerns.
Proven Methods to Remove Burn Marks From Non-Stick Pans
Here are several effective methods, ranging from gentle to more intensive, to tackle those stubborn burn marks. Always start with the least abrasive method and gradually increase intensity as needed.
1. The Simmering Water Method
This is often the first line of defense for light to moderate burn marks.
* **Instructions:** Fill the pan with water, ensuring the burn marks are submerged. Add 1-2 tablespoons of baking soda or white vinegar. Bring the mixture to a simmer over medium heat. Let it simmer for 10-15 minutes, allowing the water to loosen the burnt residue. Remove from heat and let it cool slightly. Use a non-scratch sponge or microfiber cloth to gently scrub away the loosened residue. Rinse thoroughly with warm water.
* **Why it Works:** The simmering water helps to soften the burnt food, while baking soda or vinegar act as mild degreasers and help to lift the residue from the surface. In our experience, this method works best on fresh burn marks.
2. Baking Soda Paste
Baking soda is a mild abrasive that can effectively remove tougher burn marks without damaging the non-stick coating.
* **Instructions:** Create a paste by mixing baking soda with a small amount of water until you achieve a thick consistency. Apply the paste directly to the burn marks. Let it sit for 30 minutes to an hour, allowing the baking soda to penetrate and loosen the residue. Gently scrub the area with a non-scratch sponge or microfiber cloth. Rinse thoroughly with warm water.
* **Why it Works:** Baking soda’s mild abrasive properties help to gently lift the burnt residue without scratching the non-stick surface. The paste’s consistency allows it to adhere to the burn marks for extended contact.
3. Dish Soap and Baking Soda Combination
Combining dish soap with baking soda enhances the cleaning power, especially for greasy or stubborn burn marks.
* **Instructions:** Sprinkle a generous amount of baking soda onto the burn marks. Add a few drops of dish soap. Add a small amount of water to create a paste. Let the mixture sit for 30 minutes to an hour. Gently scrub with a non-scratch sponge or microfiber cloth. Rinse thoroughly with warm water.
* **Why it Works:** The dish soap helps to cut through grease and grime, while the baking soda provides gentle abrasion. The combination creates a powerful cleaning action without being overly harsh.
4. Vinegar and Baking Soda Volcano Method
This method creates a bubbling reaction that can help to dislodge tough burn marks.
* **Instructions:** Sprinkle a generous amount of baking soda onto the burn marks. Pour a small amount of white vinegar over the baking soda. The mixture will fizz and bubble. Let the reaction subside. Add more vinegar if needed. Let it sit for 30 minutes to an hour. Gently scrub with a non-scratch sponge or microfiber cloth. Rinse thoroughly with warm water.
* **Why it Works:** The chemical reaction between baking soda and vinegar creates carbon dioxide gas, which helps to lift the burnt residue from the surface. This method is particularly effective for loosening stubborn, baked-on burns.
5. Boiling Vinegar and Salt
This method is particularly effective for mineral build-up and some types of burn marks.
* **Instructions:** Fill the pan with one cup of white vinegar and one cup of water. Add two tablespoons of salt. Bring the mixture to a boil. Let it boil for 5-10 minutes. Remove from heat and let it cool slightly. Gently scrub with a non-scratch sponge or microfiber cloth. Rinse thoroughly with warm water.
* **Why it Works:** The boiling vinegar helps to loosen the burnt food, while the salt acts as a mild abrasive to scrub away the residue.
6. The Dryer Sheet Trick
An unexpected but surprisingly effective method for loosening burnt food residue.
* **Instructions:** Place a dryer sheet in the pan. Fill the pan with warm water. Let it soak overnight. In the morning, the burnt residue should be easily wiped away. Rinse thoroughly with warm water.
* **Why it Works:** The fabric softening agents in the dryer sheet help to break down the bonds between the burnt food and the pan’s surface. This method is gentle and requires minimal scrubbing.
7. Specialized Non-Stick Cookware Cleaners
Several commercially available cleaners are specifically formulated for non-stick cookware. Always follow the manufacturer’s instructions carefully.
* **Instructions:** Apply the cleaner to the burn marks according to the product’s instructions. Let it sit for the recommended time. Gently scrub with a non-scratch sponge or microfiber cloth. Rinse thoroughly with warm water.
* **Why it Works:** These cleaners contain specialized ingredients that are designed to dissolve burnt food residue without damaging the non-stick coating.
Preventing Burn Marks: Best Practices for Non-Stick Pan Care
Prevention is always better than cure. By following these best practices, you can minimize the risk of burn marks and extend the lifespan of your non-stick pans:
* **Use Low to Medium Heat:** High heat can damage the non-stick coating and increase the likelihood of burning food. Stick to low to medium heat for most cooking tasks.
* **Avoid Overheating Empty Pans:** Never leave an empty non-stick pan on a hot burner. This can quickly damage the coating.
* **Use Oil or Butter:** Adding a small amount of oil or butter can help to prevent food from sticking and burning.
* **Stir Food Regularly:** Stirring food frequently ensures even cooking and prevents it from sticking to the pan.
* **Clean Your Pan After Each Use:** Wash your non-stick pan immediately after each use to prevent food residue from building up.
* **Avoid Metal Utensils:** Use wooden, silicone, or plastic utensils to avoid scratching the non-stick coating.
* **Hand Wash Your Pan:** While some non-stick pans are dishwasher-safe, hand washing is generally recommended to prolong their lifespan.
* **Store Your Pan Carefully:** Avoid stacking non-stick pans directly on top of each other, as this can scratch the coating. Use pan protectors or hang them up.
Understanding Non-Stick Coating Degradation
Even with the best care, non-stick coatings will eventually degrade over time. Recognizing the signs of degradation is important for safety and performance.
* **Scratches:** Scratches in the non-stick coating can expose the underlying metal and compromise the pan’s non-stick properties.
* **Peeling:** Peeling of the non-stick coating is a clear sign of degradation and can release harmful chemicals into your food.
* **Discoloration:** Discoloration of the non-stick coating can indicate overheating or damage.
* **Loss of Non-Stick Properties:** If food starts to stick to the pan more easily, it’s a sign that the non-stick coating is wearing down.
When your non-stick pan shows signs of significant degradation, it’s time to replace it.
The Role of Induction Cooktops in Preventing Burns
Induction cooktops offer precise temperature control, which can significantly reduce the risk of burning food and damaging non-stick pans. The rapid heating and cooling capabilities of induction cooktops allow for more accurate cooking and prevent overheating.
Expert Tips for Cleaning Specific Types of Burned Food
Different types of food require slightly different cleaning approaches:
* **Burnt Eggs:** Soak the pan in cold water for a few hours before attempting to clean it. This will help to loosen the egg residue.
* **Burnt Milk:** Boiling water with baking soda is often effective for removing burnt milk residue.
* **Burnt Sugar:** Soaking the pan in hot water with dish soap can help to dissolve the caramelized sugar.
* **Burnt Meat:** Use a combination of baking soda and vinegar to loosen the burnt meat residue.
Choosing the Right Non-Stick Pan
Selecting a high-quality non-stick pan can make a significant difference in its performance and longevity. Consider the following factors when choosing a non-stick pan:
* **Coating Material:** PTFE (Teflon) and ceramic are the two most common types of non-stick coatings. PTFE is known for its excellent non-stick properties, while ceramic is often marketed as a more environmentally friendly option.
* **Construction:** Look for pans with a thick base for even heat distribution.
* **Handle Material:** Choose a handle that is comfortable to grip and heat-resistant.
* **Dishwasher Safety:** Check if the pan is dishwasher-safe, although hand washing is generally recommended.
Are “Green” Cleaning Solutions Effective?
Many consumers are turning to more environmentally friendly cleaning solutions. Products like baking soda, vinegar, and lemon juice are all effective and safe options for cleaning non-stick pans. These natural cleaners can effectively remove burn marks without exposing you to harsh chemicals. Remember to always test a small, inconspicuous area first to ensure that the cleaner doesn’t damage the pan’s surface.
Q&A: Your Burning Questions Answered
Here are some frequently asked questions about removing burn marks from non-stick pans:
1. **Can I use steel wool to remove stubborn burn marks?** No! Steel wool is extremely abrasive and will scratch and ruin the non-stick coating.
2. **Is it safe to use oven cleaner on a non-stick pan?** No, oven cleaner contains harsh chemicals that can damage the non-stick coating and potentially release harmful fumes.
3. **How often should I clean my non-stick pan?** Clean your non-stick pan after each use to prevent food residue from building up.
4. **Can I put my non-stick pan in the dishwasher?** While some non-stick pans are dishwasher-safe, hand washing is generally recommended to prolong their lifespan.
5. **What is the best way to store my non-stick pans?** Avoid stacking non-stick pans directly on top of each other, as this can scratch the coating. Use pan protectors or hang them up.
6. **How can I tell if my non-stick pan is damaged?** Look for scratches, peeling, discoloration, or a loss of non-stick properties.
7. **Is it safe to cook with a scratched non-stick pan?** It’s generally not recommended to cook with a heavily scratched non-stick pan, as the exposed metal may leach into your food.
8. **What type of utensils should I use with my non-stick pan?** Use wooden, silicone, or plastic utensils to avoid scratching the non-stick coating.
9. **Can I use a metal spatula on a non-stick pan?** No, metal spatulas can scratch and damage the non-stick coating.
10. **Does cooking spray damage non-stick pans?** Yes, over time cooking sprays can leave a sticky residue that’s hard to remove, and it can degrade the non-stick coating.
Conclusion: Restore and Maintain Your Non-Stick Cookware
Removing burn marks from non-stick pans doesn’t have to be a daunting task. By understanding the causes of burn marks, following our expert cleaning methods, and practicing proper preventative care, you can keep your non-stick cookware in pristine condition for years to come. Remember to always use gentle cleaning techniques and avoid abrasive materials to protect the delicate non-stick coating. With a little effort and the right approach, you can enjoy the convenience and benefits of non-stick cooking without the frustration of stubborn burn marks. Now that you’re armed with this knowledge, go forth and conquer those burnt messes! Share your experiences with **remove burn marks from non stick pan** in the comments below. What methods have worked best for you? We’d love to hear your tips and tricks!
