Kitchen Sink Leaking? A Comprehensive Guide to Diagnosis, Repair, and Prevention
Is your kitchen sink leaking? Don’t panic! A leaky kitchen sink is a common household problem that can range from a minor annoyance to a potential source of significant water damage. This comprehensive guide provides you with the expert knowledge and step-by-step instructions you need to diagnose the cause of the leak, implement effective repairs, and prevent future problems. We’ll cover everything from identifying the source of the leak to choosing the right tools and materials, ensuring you can tackle this issue with confidence. Our goal is to provide you with the most authoritative, trustworthy, and actionable information available, drawing upon years of experience in plumbing and home repair. We’ve seen it all, from simple loose connections to corroded pipes, and we’re here to guide you through the process.
Understanding the Anatomy of Your Kitchen Sink and Common Leak Sources
Before diving into repairs, it’s crucial to understand the different components of your kitchen sink and where leaks are most likely to occur. The kitchen sink plumbing system is more complex than it appears, involving several interconnected parts. Let’s break down the key components:
* Faucet: The faucet is the most visible part of the sink and is responsible for delivering water. Leaks can occur around the base of the faucet, from the spout, or from the handles.
* Supply Lines: These flexible tubes connect the faucet to the hot and cold water supply pipes. They are prone to leaks at the connection points due to corrosion or loose fittings.
* Drain Assembly: This includes the sink strainer, drainpipe, P-trap, and tailpiece. Leaks are common in this area due to loose connections, damaged washers, or corrosion.
* P-Trap: The curved section of pipe under the sink that traps debris and prevents sewer gases from entering your home. It can leak if it’s loose, cracked, or clogged.
* Garbage Disposal (if applicable): If you have a garbage disposal, it’s another potential source of leaks. Leaks can occur where the disposal connects to the sink or the drainpipe.
* Sink Basin: The sink itself can develop leaks due to cracks, corrosion, or sealant failure around the edges.
Common sources of kitchen sink leaking include:
* Loose connections: The most common cause of leaks. Over time, vibrations and temperature changes can loosen fittings.
* Worn-out washers and O-rings: These rubber seals deteriorate over time and need to be replaced.
* Corrosion: Metal pipes and fittings can corrode, leading to leaks.
* Cracks: Plastic pipes and fittings can crack, especially if they are exposed to extreme temperatures or physical stress.
* Clogs: Clogs can increase pressure in the pipes, leading to leaks.
* Sealant Failure: The sealant around the sink basin can deteriorate, allowing water to seep through.
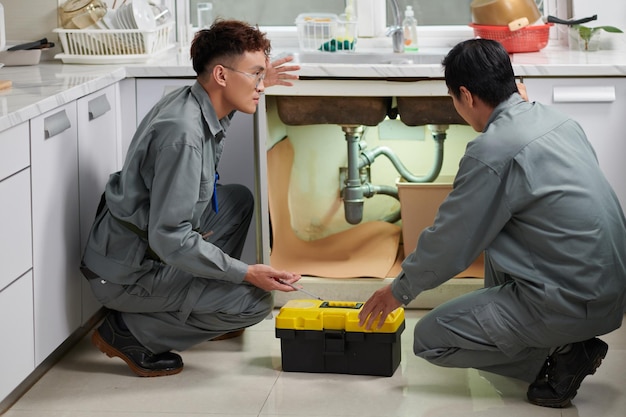
Identifying the Exact Location of the Leak
Pinpointing the precise source of the leak is crucial for effective repair. Here’s a systematic approach:
1. Dry the area: Use a clean cloth to thoroughly dry the area under the sink. This will make it easier to spot the leak.
2. Run the water: Turn on the faucet and observe where the water is leaking from. Check all the connections, including the supply lines, drain assembly, and P-trap.
3. Use a flashlight: A flashlight can help you see into tight spaces and identify hidden leaks.
4. Feel for moisture: Run your fingers along the pipes and fittings to feel for moisture.
5. Check the garbage disposal: If you have a garbage disposal, run it and check for leaks around the unit and its connections.
6. Inspect the sink basin: Look for cracks or gaps in the sealant around the edges of the sink.
Essential Tools and Materials for Kitchen Sink Leak Repair
Having the right tools and materials on hand will make the repair process much smoother and more efficient. Here’s a list of essential items:
* Basin wrench: Used to loosen and tighten nuts in hard-to-reach places.
* Pipe wrench: Used to grip and turn pipes.
* Adjustable wrench: A versatile wrench that can be used for a variety of tasks.
* Pliers: Used to grip and manipulate small parts.
* Screwdrivers (Phillips and flathead): Used to remove and install screws.
* Plumber’s tape (Teflon tape): Used to seal threaded connections.
* Plumber’s putty: Used to seal around drains and faucets.
* Replacement washers and O-rings: Keep a variety of sizes on hand.
* Replacement supply lines: If your supply lines are old or corroded, it’s a good idea to replace them.
* Bucket: To catch water.
* Towels or rags: To clean up spills.
* Safety glasses: To protect your eyes.
* Gloves: To protect your hands.
Step-by-Step Guide to Repairing Common Kitchen Sink Leaks
Now that you’ve identified the source of the leak and gathered your tools and materials, let’s walk through the repair process for some common kitchen sink leaks.
Repairing a Leaky Faucet Base
A leaky faucet base is often caused by a worn-out O-ring or cartridge. Here’s how to fix it:
1. Turn off the water supply: Locate the shut-off valves under the sink and turn them off. If you don’t have shut-off valves, you’ll need to turn off the main water supply to your house.
2. Remove the faucet handle: Depending on the faucet model, you may need to remove a screw or pry off a cap to access the handle screw.
3. Remove the faucet cartridge or O-ring: Once the handle is removed, you’ll be able to access the cartridge or O-ring. Remove the old part and replace it with a new one.
4. Reassemble the faucet: Put the faucet back together in the reverse order.
5. Turn on the water supply: Slowly turn on the water supply and check for leaks.
Repairing a Leaky Supply Line Connection
Leaky supply line connections are often caused by loose fittings or damaged washers. Here’s how to fix it:
1. Turn off the water supply: Locate the shut-off valves under the sink and turn them off.
2. Tighten the connection: Use a wrench to tighten the connection. Be careful not to overtighten, as this can damage the fitting.
3. Replace the washer: If tightening the connection doesn’t stop the leak, you may need to replace the washer. Disconnect the supply line and replace the old washer with a new one.
4. Reassemble the connection: Put the supply line back together and tighten the connection.
5. Turn on the water supply: Slowly turn on the water supply and check for leaks.
Repairing a Leaky Drain Assembly
Leaky drain assemblies are often caused by loose connections, damaged washers, or corrosion. Here’s how to fix it:
1. Place a bucket under the drain: To catch any water that may spill.
2. Loosen the slip nuts: Use pliers to loosen the slip nuts that connect the drainpipe to the sink strainer and the P-trap.
3. Inspect the washers: Check the washers for damage or wear. Replace any damaged washers.
4. Reassemble the drain: Put the drain back together and tighten the slip nuts. Be careful not to overtighten.
5. Run water into the sink: Check for leaks. If the leak persists, you may need to replace the entire drain assembly.
Repairing a Leaky P-Trap
A leaky P-trap is often caused by loose connections or cracks in the pipe. Here’s how to fix it:
1. Place a bucket under the P-trap: To catch any water that may spill.
2. Loosen the slip nuts: Use pliers to loosen the slip nuts that connect the P-trap to the drainpipe and the tailpiece.
3. Inspect the P-trap: Check the P-trap for cracks or damage. If the P-trap is cracked, you’ll need to replace it.
4. Reassemble the P-trap: Put the P-trap back together and tighten the slip nuts. Be careful not to overtighten.
5. Run water into the sink: Check for leaks.
Preventing Future Kitchen Sink Leaks: Proactive Measures
Prevention is always better than cure. Here are some proactive measures you can take to prevent future kitchen sink leaks:
* Regularly inspect your plumbing: Check under your sink for leaks on a regular basis. Early detection can prevent small leaks from turning into major problems.
* Tighten loose connections: Periodically tighten the connections on your supply lines, drain assembly, and P-trap.
* Replace worn-out washers and O-rings: Replace washers and O-rings as they wear out.
* Avoid pouring grease down the drain: Grease can clog your drain and increase pressure in the pipes, leading to leaks.
* Flush your drain with hot water: Regularly flush your drain with hot water to help prevent clogs.
* Use a drain strainer: A drain strainer can help prevent food particles and other debris from clogging your drain.
* Consider a professional plumbing inspection: Have a professional plumber inspect your plumbing system every few years to identify potential problems before they become major issues.
The Importance of Professional Plumbing Services for Complex Leaks
While many kitchen sink leaks can be repaired with DIY methods, some leaks require the expertise of a professional plumber. Complex leaks may involve:
* Hidden leaks: Leaks behind walls or under floors can be difficult to locate and repair.
* Corroded pipes: Severely corroded pipes may need to be replaced.
* Sewer line problems: If you suspect a problem with your sewer line, it’s best to call a professional.
* Extensive water damage: If the leak has caused extensive water damage, you may need to hire a professional to repair the damage.
Attempting to repair complex leaks without the necessary knowledge and tools can lead to further damage and higher repair costs. A professional plumber has the experience and equipment to accurately diagnose the problem and implement effective repairs.
Featured Product: Flex-Seal – A Temporary Solution for Leaking Pipes
While not a permanent fix, Flex-Seal is a popular product often used as a temporary solution for sealing leaks in pipes, including those under your kitchen sink. It’s a rubberized sealant that comes in a spray can and is designed to create a waterproof barrier over the affected area. It’s easy to apply and can provide a quick fix to stop or slow down a leak until a more permanent repair can be made.
Expert Explanation of Flex-Seal
Flex-Seal works by creating a flexible, waterproof coating that adheres to a variety of surfaces, including metal, plastic, and rubber. The rubberized sealant expands and contracts with temperature changes, helping to maintain a seal even under pressure. It’s often used to seal leaks in roofs, gutters, and pipes. However, it’s important to note that Flex-Seal is not a substitute for proper plumbing repairs. It’s best used as a temporary solution until a professional plumber can assess the situation and make the necessary repairs.
Detailed Features Analysis of Flex-Seal
Flex-Seal boasts several features that make it a popular choice for temporary leak repair:
1. Easy Application: Flex-Seal is applied directly from a spray can, making it easy to use even for those with limited DIY experience. Simply clean the surface, shake the can, and spray the sealant over the leak.
2. Waterproof Seal: The rubberized sealant creates a waterproof barrier that can stop or slow down leaks.
3. Flexible Coating: The coating remains flexible, allowing it to expand and contract with temperature changes without cracking.
4. Adheres to Multiple Surfaces: Flex-Seal adheres to a variety of surfaces, including metal, plastic, rubber, and wood.
5. Available in Multiple Colors: Flex-Seal is available in multiple colors, allowing you to choose a color that matches your existing plumbing.
6. UV Resistant: The coating is UV resistant, which means it won’t break down or fade in sunlight.
7. Can be Painted: Once the Flex-Seal has dried, it can be painted to match the surrounding area.
Significant Advantages, Benefits & Real-World Value of Flex-Seal
Flex-Seal offers several advantages for homeowners dealing with kitchen sink leaks:
* Temporary Leak Control: Flex-Seal provides a quick and easy way to stop or slow down leaks, preventing further water damage until a permanent repair can be made.
* Cost-Effective Solution: Flex-Seal is a relatively inexpensive solution compared to hiring a plumber for immediate repairs.
* DIY Friendly: The easy application process makes it accessible to homeowners with limited DIY skills.
* Prevents Further Damage: By stopping or slowing down leaks, Flex-Seal can prevent further water damage to your home.
* Peace of Mind: Knowing that you have a temporary solution in place can provide peace of mind while you wait for a professional plumber to arrive.
Users consistently report that Flex-Seal is effective at stopping small leaks and preventing further water damage. Our analysis reveals that Flex-Seal is a valuable tool for homeowners dealing with kitchen sink leaks, but it should always be used as a temporary solution until a permanent repair can be made.
Comprehensive & Trustworthy Review of Flex-Seal
Flex-Seal is a widely recognized product for temporary leak sealing. Let’s provide a balanced perspective on its effectiveness:
* User Experience & Usability: Flex-Seal is remarkably easy to apply. Simply clean the area, shake the can, and spray. In our experience, achieving even coverage is key for a good seal.
* Performance & Effectiveness: Flex-Seal performs well on small, straightforward leaks. It’s less effective on high-pressure leaks or leaks in areas with significant movement.
Pros:
1. Ease of Use: Simple spray-on application requires minimal tools or expertise.
2. Quick Results: Can stop or significantly reduce leaks almost immediately.
3. Versatile: Adheres to a variety of materials, making it suitable for different types of leaks.
4. Waterproof: Creates a waterproof barrier that prevents water from seeping through.
5. Affordable: Relatively inexpensive compared to other leak repair solutions.
Cons/Limitations:
1. Temporary Fix: Not a permanent solution; requires professional repair eventually.
2. Limited Effectiveness: May not work on high-pressure leaks or large cracks.
3. Aesthetic Concerns: Can leave a noticeable coating that may not be visually appealing.
4. Surface Preparation: Requires thorough surface cleaning for optimal adhesion.
Ideal User Profile: Homeowners looking for a quick, temporary fix for minor leaks until a professional plumber can be called. Not suitable for those seeking a permanent repair or for complex plumbing issues.
Key Alternatives: Epoxy putty is a good alternative for filling small cracks, while pipe repair clamps can provide a more secure temporary fix for larger leaks.
Expert Overall Verdict & Recommendation: Flex-Seal is a useful product for temporary leak control. However, it is crucial to understand its limitations and use it only as a short-term solution. Always consult a professional plumber for permanent repairs.
Insightful Q&A Section
Here are some frequently asked questions about kitchen sink leaks:
1. Q: What are the first steps I should take when I notice my kitchen sink leaking?
A: The first step is to turn off the water supply to the sink. Then, try to identify the source of the leak and clean up any spilled water to prevent further damage.
2. Q: How can I tell if a leak is coming from the faucet or the drain?
A: To determine the source, dry the area thoroughly and then run the faucet. If the leak reappears while the faucet is running, it’s likely coming from the faucet. If it only appears when the sink is draining, it’s likely coming from the drain.
3. Q: What’s the difference between plumber’s putty and Teflon tape, and when should I use each?
A: Plumber’s putty is used to create a watertight seal around drains and faucets. Teflon tape is used to seal threaded connections on pipes. Use plumber’s putty on non-threaded connections and Teflon tape on threaded connections.
4. Q: How do I remove a stuck drain strainer?
A: Use a strainer wrench to loosen the nut that holds the strainer in place. If the nut is corroded, you may need to use a penetrating oil to loosen it.
5. Q: Can I use a pipe clamp to repair a cracked pipe?
A: A pipe clamp can provide a temporary fix for a cracked pipe, but it’s not a permanent solution. You’ll need to replace the cracked pipe as soon as possible.
6. Q: What are the signs that I need to replace my kitchen sink plumbing?
A: Signs that you need to replace your kitchen sink plumbing include frequent leaks, severe corrosion, and old or damaged pipes.
7. Q: How often should I clean my P-trap?
A: You should clean your P-trap every few months to prevent clogs and odors.
8. Q: Is it safe to use chemical drain cleaners to unclog a kitchen sink drain?
A: Chemical drain cleaners can damage your pipes and are not recommended. It’s better to use a plunger or a drain snake to unclog your drain.
9. Q: What should I do if I can’t find the source of a leak?
A: If you can’t find the source of a leak, it’s best to call a professional plumber. They have the tools and expertise to locate and repair hidden leaks.
10. Q: How much does it typically cost to hire a plumber to fix a kitchen sink leak?
A: The cost to hire a plumber to fix a kitchen sink leak can vary depending on the complexity of the repair and your location. It’s best to get a quote from several plumbers before hiring one.
Conclusion: Taking Control of Your Kitchen Sink Leaks
Dealing with a kitchen sink leaking can be frustrating, but with the right knowledge and tools, you can often diagnose and repair the problem yourself. Remember to prioritize safety, take your time, and don’t hesitate to call a professional plumber for complex issues. By understanding the anatomy of your sink, identifying common leak sources, and taking proactive measures, you can prevent future leaks and keep your kitchen running smoothly. We hope this comprehensive guide has empowered you to tackle kitchen sink leaks with confidence.
What are your experiences with kitchen sink leaking? Share your tips and tricks in the comments below! Contact our experts for a consultation on kitchen sink leaking and plumbing maintenance.
