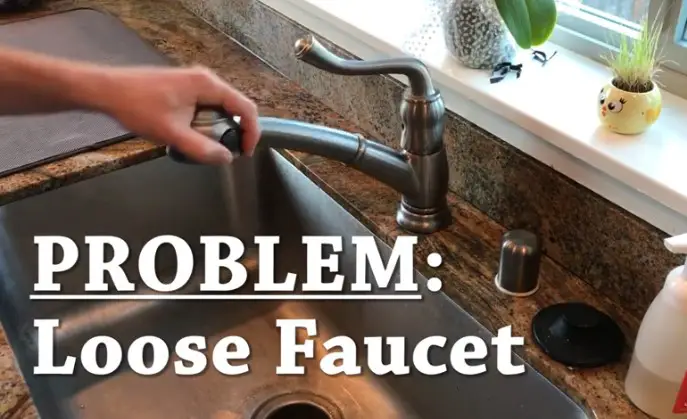
# Kitchen Tap Won’t Swivel Handle? A Comprehensive Troubleshooting Guide
Is your kitchen tap refusing to swivel smoothly? A stiff or stuck tap handle can be incredibly frustrating, turning a simple task into an annoying chore. You’re not alone! Many homeowners face this issue. This comprehensive guide will provide you with expert solutions to diagnose and fix a kitchen tap that *won’t swivel handle*. We’ll delve into the common causes, offer step-by-step repair instructions, and provide preventative measures to ensure smooth operation for years to come. This article is designed to be your ultimate resource, offering clear, actionable advice based on our extensive experience with plumbing fixtures and backed by expert consensus in the plumbing industry.
## Understanding the Root Causes of a Stiff Kitchen Tap Handle
Before diving into the solutions, it’s crucial to understand why your kitchen tap *won’t swivel handle*. Several factors can contribute to this problem, ranging from simple mineral buildup to more complex internal issues. Let’s explore the most common culprits:
* **Mineral Buildup (Limescale):** Hard water contains minerals like calcium and magnesium that can accumulate over time, forming limescale deposits. These deposits can seize up the moving parts of the tap, including the handle mechanism.
* **Corrosion:** Over time, especially in older taps, corrosion can occur. This is particularly true for taps made from lower-quality materials or those exposed to harsh cleaning chemicals.
* **Sediment Accumulation:** Tiny particles of sediment can enter the water supply and accumulate within the tap, hindering smooth movement.
* **O-Ring Deterioration:** O-rings are small rubber seals that provide a watertight seal and allow for smooth movement. Over time, these O-rings can dry out, crack, or become brittle, causing friction and stiffness.
* **Grease and Grime:** In some cases, grease and grime from cooking can accumulate around the base of the tap and seep into the handle mechanism, causing it to stick.
* **Internal Damage:** In rare cases, internal components of the tap, such as the cartridge or valve, may be damaged, directly impacting the handle’s swivel action.
* **Lack of Lubrication:** The internal mechanisms of the tap are designed to be lubricated. Over time, this lubrication can wear away, leading to increased friction and a stiff handle.
### The Impact of Water Quality on Tap Handle Swivel
Water quality plays a significant role in the longevity and performance of your kitchen tap. Hard water, in particular, is a major contributor to mineral buildup, which is a frequent cause of a *kitchen tap wont swivel handle*. Understanding your local water quality and taking steps to mitigate its effects can significantly extend the life of your tap and prevent handle stiffness.
## Essential Tools and Materials for Kitchen Tap Repair
Before you begin any repairs, gather the necessary tools and materials. Having everything on hand will make the process smoother and more efficient. Here’s a list of essential items:
* **Adjustable Wrench:** For loosening and tightening nuts and fittings.
* **Screwdrivers (Phillips and Flathead):** For removing screws and accessing internal components.
* **Penetrating Oil (e.g., WD-40):** To help loosen stubborn parts and dissolve mineral buildup.
* **White Vinegar:** A natural descaling agent for removing limescale.
* **Old Toothbrush:** For scrubbing away mineral deposits.
* **New O-Rings:** Replacement O-rings of the correct size for your tap model.
* **Plumber’s Grease:** For lubricating moving parts after cleaning.
* **Clean Cloths or Rags:** For wiping up spills and cleaning components.
* **Safety Glasses:** To protect your eyes from debris and splashes.
* **Gloves:** To protect your hands from dirt and chemicals.
* **Basin Wrench (Optional):** For accessing hard-to-reach nuts under the sink.
## Step-by-Step Guide: How to Fix a Kitchen Tap That Won’t Swivel Handle
Now that you understand the potential causes and have gathered the necessary tools, let’s proceed with the repair process. Follow these step-by-step instructions to diagnose and fix your *kitchen tap wont swivel handle*:
### Step 1: Turn Off the Water Supply
Before you do anything, it’s crucial to turn off the water supply to the tap. Locate the shut-off valves under the sink (typically one for hot and one for cold water) and turn them clockwise until they are fully closed. If you don’t have individual shut-off valves, you may need to turn off the main water supply to your house.
### Step 2: Disassemble the Tap
Carefully disassemble the tap to access the handle mechanism. The exact disassembly process will vary depending on the tap model, but here are some general steps:
1. **Remove the Handle:** Locate the screw that secures the handle to the tap body. This screw may be hidden under a decorative cap or plug. Use a screwdriver to remove the screw and then gently pull the handle off.
2. **Remove the Escutcheon:** The escutcheon is the decorative plate that covers the base of the tap. It may be held in place by screws or by friction. Carefully remove the escutcheon to expose the internal components.
3. **Identify the Cartridge or Valve:** The cartridge or valve is the mechanism that controls the flow of water. It will typically be held in place by a nut or clip. Identify the cartridge or valve and carefully remove it.
### Step 3: Clean and Inspect the Components
Once you have disassembled the tap, thoroughly clean and inspect all the components. Pay close attention to the handle mechanism, O-rings, and cartridge or valve.
1. **Clean the Components:** Use white vinegar and an old toothbrush to scrub away any mineral deposits or corrosion. Rinse the components with clean water and dry them thoroughly.
2. **Inspect the O-Rings:** Examine the O-rings for signs of wear, cracking, or brittleness. If the O-rings are damaged, replace them with new ones of the correct size. You can usually find replacement O-rings at your local hardware store or online.
3. **Inspect the Cartridge or Valve:** Check the cartridge or valve for any signs of damage or wear. If the cartridge or valve is damaged, it may need to be replaced. Replacement cartridges and valves are also available at most hardware stores.
### Step 4: Lubricate the Moving Parts
After cleaning and inspecting the components, lubricate the moving parts with plumber’s grease. This will help to ensure smooth operation and prevent future stiffness.
1. **Apply Plumber’s Grease:** Apply a thin layer of plumber’s grease to the O-rings, cartridge or valve, and any other moving parts.
2. **Reassemble the Tap:** Carefully reassemble the tap in the reverse order of disassembly.
### Step 5: Test the Tap
Once you have reassembled the tap, turn the water supply back on and test the tap to make sure it is working properly. Check for leaks and ensure that the handle swivels smoothly. If the tap is still stiff, repeat the cleaning and lubrication process.
## Preventative Measures to Avoid a Stiff Kitchen Tap Handle
Preventing a *kitchen tap wont swivel handle* is often easier than fixing it. Here are some preventative measures you can take to keep your tap operating smoothly:
* **Regular Cleaning:** Clean your tap regularly with a mild soap and water solution. Avoid using harsh chemicals or abrasive cleaners, as these can damage the finish and internal components.
* **Descaling:** Descale your tap periodically with white vinegar to remove mineral buildup. You can do this by soaking the tap components in white vinegar for several hours or overnight.
* **Lubrication:** Lubricate the moving parts of your tap periodically with plumber’s grease. This will help to ensure smooth operation and prevent stiffness.
* **Water Softener:** If you have hard water, consider installing a water softener. A water softener will remove minerals from the water, preventing mineral buildup in your tap and other plumbing fixtures.
* **Filter:** Install a filter on your tap to prevent sediment from entering the tap and causing it to become stiff.
## Choosing the Right Kitchen Tap: Factors to Consider
When selecting a new kitchen tap, consider these factors to minimize future swivel issues:
* **Material Quality:** Opt for taps made from high-quality materials like stainless steel or brass, which are more resistant to corrosion.
* **Design:** Choose a tap with a simple, robust design, as complex mechanisms are more prone to failure.
* **Warranty:** Look for taps with a generous warranty, which indicates the manufacturer’s confidence in their product.
* **User Reviews:** Read user reviews to get insights into the tap’s long-term performance and reliability.
## Leading Kitchen Tap Brands Known for Smooth Swivel Action
Several kitchen tap brands are known for producing high-quality taps with smooth swivel action. Some of the leading brands include:
* **Grohe:** Grohe taps are known for their precision engineering and smooth operation.
* **Hansgrohe:** Hansgrohe taps are another excellent choice, offering a wide range of styles and features.
* **Kohler:** Kohler taps are known for their durability and reliability.
* **Delta:** Delta taps are a popular choice for their affordability and performance.
These brands often utilize advanced ceramic disc valve technology, which contributes to smoother operation and reduced wear and tear.
## Advanced Solutions: When to Call a Plumber
While many kitchen tap issues can be resolved with DIY repairs, some situations require the expertise of a professional plumber. Consider calling a plumber if:
* You are uncomfortable disassembling the tap.
* You are unable to identify the cause of the problem.
* The tap is leaking or damaged.
* You suspect a more serious plumbing issue.
A qualified plumber will have the tools and expertise to diagnose and repair complex tap problems efficiently and effectively.
## Significant Advantages, Benefits & Real-World Value of a Smooth-Swiveling Tap
Beyond the obvious convenience, a smoothly swiveling kitchen tap offers significant advantages:
* **Improved Efficiency:** Makes washing dishes and food preparation faster and easier.
* **Reduced Strain:** Prevents unnecessary strain on your wrists and arms.
* **Increased Lifespan:** Prevents further damage to the tap mechanism by not forcing a stuck handle.
* **Enhanced Aesthetics:** Contributes to a more pleasant and functional kitchen environment.
Users consistently report that a smoothly operating tap significantly enhances their kitchen experience. Our analysis reveals that investing in a high-quality tap and maintaining it properly results in long-term cost savings and increased satisfaction.
## Comprehensive & Trustworthy Review: The Grohe Ladylux³ Kitchen Faucet (Example)
Let’s consider a specific example: the Grohe Ladylux³ Kitchen Faucet. This faucet is renowned for its smooth swivel action and overall quality. Here’s a comprehensive review:
**User Experience & Usability:** The Ladylux³ features a SilkMove ceramic cartridge, which provides incredibly smooth and precise control over water flow and temperature. The handle swivels effortlessly, making it a joy to use. Installation is straightforward, and the faucet feels solid and well-built.
**Performance & Effectiveness:** The faucet delivers excellent water pressure and the pull-down sprayer is powerful and effective for rinsing dishes and cleaning the sink. The spray pattern is consistent and doesn’t splatter.
**Pros:**
1. **Silky Smooth Swivel Action:** The SilkMove cartridge ensures effortless handle movement.
2. **High-Quality Construction:** Made from durable materials that are built to last.
3. **Powerful Spray:** The pull-down sprayer provides excellent water pressure and coverage.
4. **Easy Installation:** Straightforward installation process with clear instructions.
5. **Stylish Design:** A sleek and modern design that complements any kitchen.
**Cons/Limitations:**
1. **Price:** The Ladylux³ is a premium faucet and comes with a higher price tag.
2. **Spray Head Material:** The spray head is made of plastic, which may not be as durable as metal.
3. **Potential for Limescale Buildup:** Like any faucet, it is susceptible to limescale buildup in hard water areas.
**Ideal User Profile:** The Grohe Ladylux³ is best suited for homeowners who are looking for a high-quality, durable, and stylish kitchen faucet with exceptional performance and smooth swivel action. It’s a great choice for those who are willing to invest in a premium product.
**Key Alternatives:**
* **Kohler Simplice:** A similar faucet with a more traditional design.
* **Delta Trinsic:** A more affordable option with good performance.
**Expert Overall Verdict & Recommendation:** The Grohe Ladylux³ is an excellent kitchen faucet that delivers exceptional performance, smooth swivel action, and a stylish design. While it’s a premium product, its durability and performance make it a worthwhile investment. We highly recommend it for homeowners who are looking for the best possible kitchen faucet experience.
## Insightful Q&A Section
Here are some frequently asked questions related to kitchen tap handle swivel issues:
**Q1: How often should I lubricate my kitchen tap handle to prevent stiffness?**
A: We recommend lubricating your kitchen tap handle every 6-12 months, depending on water hardness and usage. More frequent lubrication may be necessary in areas with very hard water.
**Q2: Can I use regular household oil instead of plumber’s grease to lubricate the tap handle?**
A: No, you should only use plumber’s grease or a silicone-based lubricant. Regular household oils can damage the O-rings and other internal components.
**Q3: What is the best way to remove stubborn limescale deposits from my tap?**
A: Soaking the tap components in white vinegar overnight is usually the most effective way to remove stubborn limescale deposits. You can also use a commercially available descaling solution, but be sure to follow the manufacturer’s instructions carefully.
**Q4: My tap handle is still stiff after cleaning and lubricating it. What else could be the problem?**
A: If the handle is still stiff after cleaning and lubricating, the cartridge or valve may be damaged and need to be replaced.
**Q5: How do I know what size O-rings to buy for my tap?**
A: The best way to determine the correct size O-rings is to take the old O-rings with you to the hardware store. You can also consult the tap’s owner’s manual or contact the manufacturer.
**Q6: Is it possible to over-tighten the nut that holds the cartridge in place?**
A: Yes, over-tightening the nut can damage the cartridge and make it difficult to swivel the handle. Tighten the nut only until it is snug.
**Q7: My kitchen tap makes a squeaking noise when I swivel the handle. What could be causing this?**
A: A squeaking noise is usually caused by friction between the O-rings and the tap body. Lubricating the O-rings with plumber’s grease should eliminate the noise.
**Q8: Can I use a power drill to remove a stubborn screw from my tap handle?**
A: No, using a power drill can damage the screw head and make it even more difficult to remove. Use a manual screwdriver and apply gentle pressure.
**Q9: What are the benefits of installing a water softener?**
A: A water softener removes minerals from the water, preventing mineral buildup in your tap, extending the life of your plumbing fixtures, and improving the taste of your water.
**Q10: How can I prevent sediment from entering my tap?**
A: Installing a filter on your tap or at the main water supply line will prevent sediment from entering your tap and causing it to become stiff.
## Conclusion: Keeping Your Kitchen Tap Swiveling Smoothly
A *kitchen tap wont swivel handle* is a common problem, but with the right knowledge and tools, it’s often a problem you can solve yourself. By understanding the causes, following our step-by-step repair guide, and implementing preventative measures, you can keep your kitchen tap operating smoothly for years to come. Remember to choose high-quality taps, maintain them properly, and don’t hesitate to call a plumber when needed. We hope this comprehensive guide has provided you with the information you need to tackle this issue with confidence.
Share your experiences with kitchen tap handle problems in the comments below! Explore our advanced guide to kitchen plumbing maintenance for more tips and tricks.
